If
you've ever deleted a photo album by mistake or had your Smartphone
accidentally wipe everything from your gallery, then you know that
particular variety of ''bottomless pit in your guts'' feeling. Never fear,
your lost photos are not really lost at all. We'll show you just how easy it
is to recover photos on Android. There's only one thing to remember: act
fast.
 Learn
how to recover deleted photos with this guide.
Sponsored:
FonePaw Android Data Recovery
FonePaw Android Data Recovery is able to recover
deleted photos from your Android device in
the blink of an eye. With simple operation of the user-friendly
interface, you can recover your lost or deleted photos effortlessly and
effectively.
This
high-quality photo recovery program works across multiple platforms and
devices, including Android phones and tablets from manufacturers like Sony,
Google, Huawei, Samsung, Motorola, LG and many more. Restore all of your
valuable pictures right now by downloading the FonePaw Android Data Recovery
system.
Click here to download the FonePaw Android Data
Recovery software.
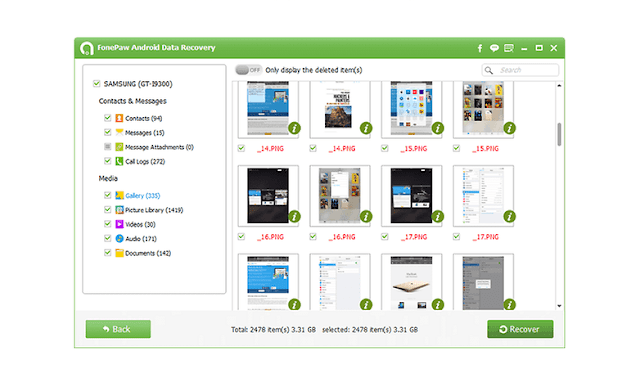 Recover
all of your photos now with FonePaw's Android Data Recovery system.
How
to recover lost photos on Android
First
of all: turn off Wi-Fi and data connections on your phone. The reason to
do this is that when data is deleted, whether photos, music or documents, it
is not actually deleted until something has been written over it in the
device's memory.
All
that is initially deleted is the index that points to where the data starts in
your memory, so as long as you can find that point again, you can get your
deleted pictures back. If that new data gets written over the top of where
your lost pictures are, they will be lost forever. A poorly-timed
update can be disastrous.
Note: this
process requires root privileges on your phone.
1. Download
a free program called Dr.Fone
for Android by Wondershare (available for
Mac or PC) on to your computer. There are other programs available, but
we've always had good results with Dr.Fone.
2. Install the program, launch it
and register. You'll see the screen below.
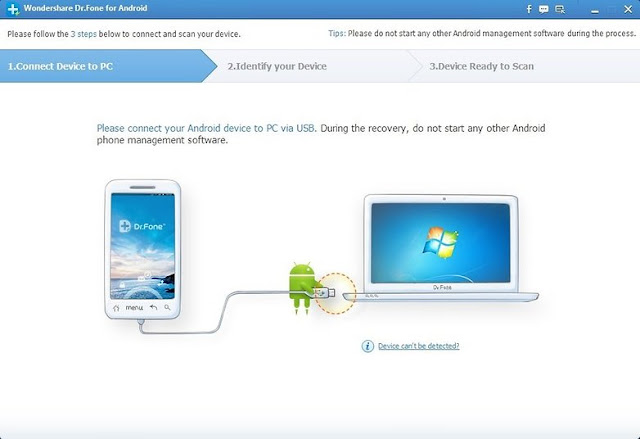 Connect
your phone to your PC with a USB cable.
3. Connect your smartphone to your
computer with a USB cable.
You
need to have USB debugging enabled on your Smartphone for this process to
work. If you don't, simply go to your Settings
> About Phone and tap Build
Number repeatedly until the notification appears, telling you that
Developer Options have been enabled.
Back
in your main Settings screen,
you'll see Developer Options down
near the bottom. Scroll through the settings until you see USB Debugging and check the box beside
it. You'll see a notification at the bottom of the Dr.Fone screen saying that
USB Debugging is being opened.
For
devices running Android Lollipop, you will need to authorize the PC via the
prompt that will appear on your phone.
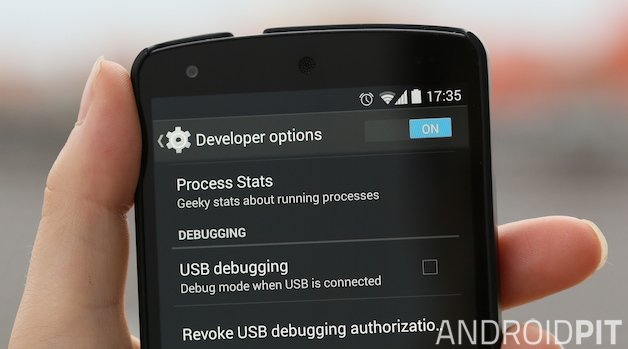 USB
debugging must be enabled for data recovery to work.
4. Once Dr.Fone for Android has made the
connection to your smartphone, you'll be able to select from the following
categories of deleted files. We're only after photos, but if you've lost
more than that you can tick as many categories as you like.
5. The next step asks you to scan for
deleted files or all files. If you're after a quick recovery of your lost
pictures to set your mind at rest, take the 'Deleted
files' option. You'll need to accept the RSA key prompt on your
smartphone (check 'Always accept' to make it easier), making the
connection between the two devices secure and, of course, grant Superuser
permission when prompted.
6. One this is done, Dr.Fone will analyze
your phone and reboot it. If you receive a message on your PC to say your
phone has connected again, ignore it; just let Dr.Fone do its thing.
Any prompts on your phone that request permissions for Dr.Fone should be
granted.
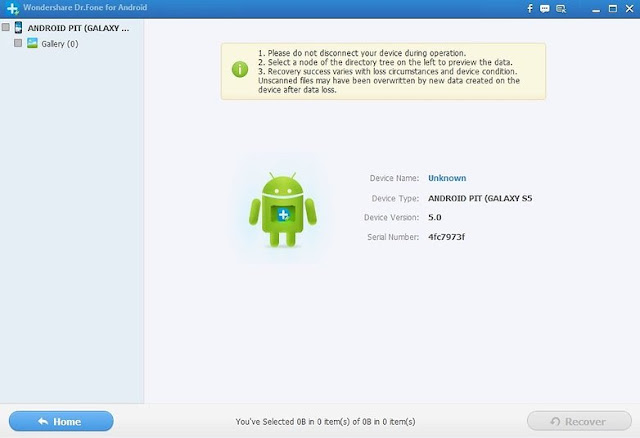 Let
the program scan your device for current and deleted files.
7. Once Dr.Fone has finished analyzing
your phone you'll get the scan results screen where you can check the boxes
for the photos (or other files, as you can see below, depending which
file types you selected earlier) that you want to save, then hit Recover and you're golden.
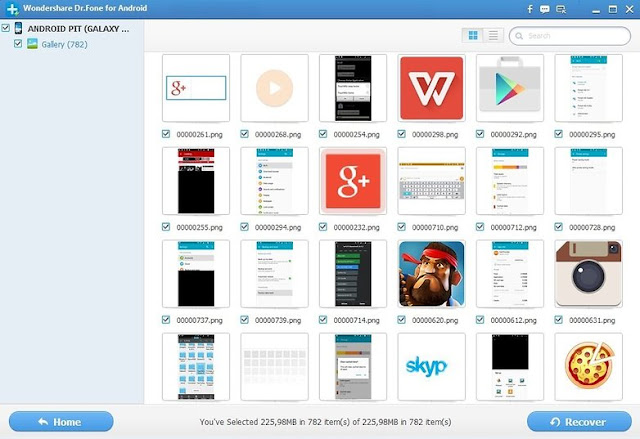
Simply
choose the files you want to save and hit recover.
8. If you've made it this far you've
hopefully learned a valuable lesson and will make regular copies of your
smartphone photos from now on. Don't worry, we have plenty of tutorials on the
site for that too.


0 comments:
Post a Comment